Glossary Cloud user guide
Spectrum Groupe is pleased to announce that we are releasing Glossary new version compatible with Confluence Cloud.
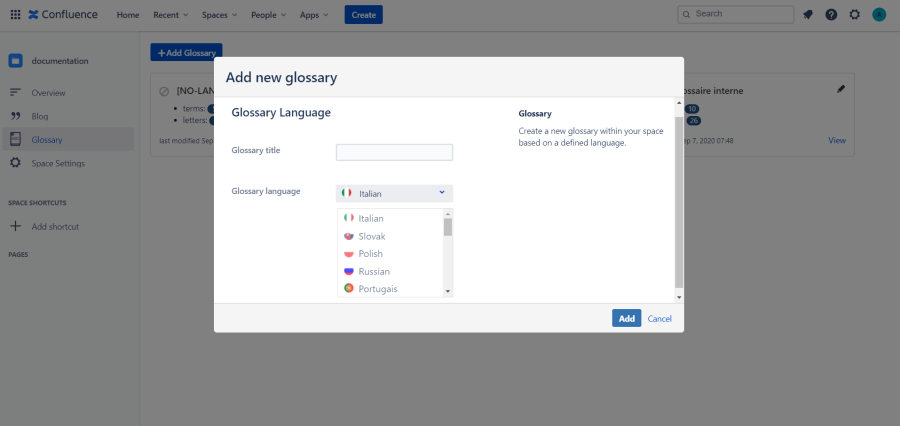
In this first version, Glossaries can be managed based on their languages where you can find multiple glossaries per space. You still can create a unique glossary in a space. This app is totally adjustable on the user's need!
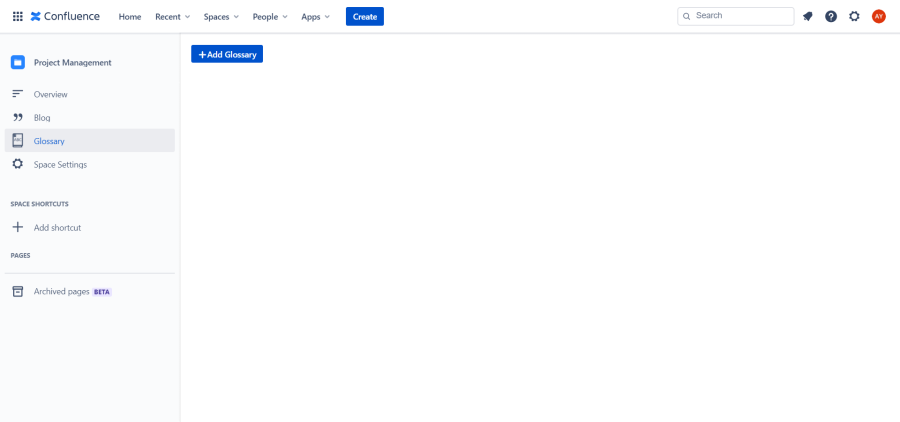
After the creation of the glossary, at a glance, you can find all glossaries created in one place in each space
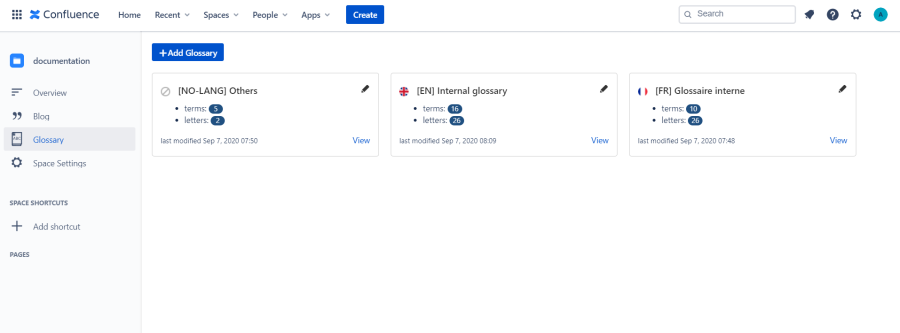
Glossary view
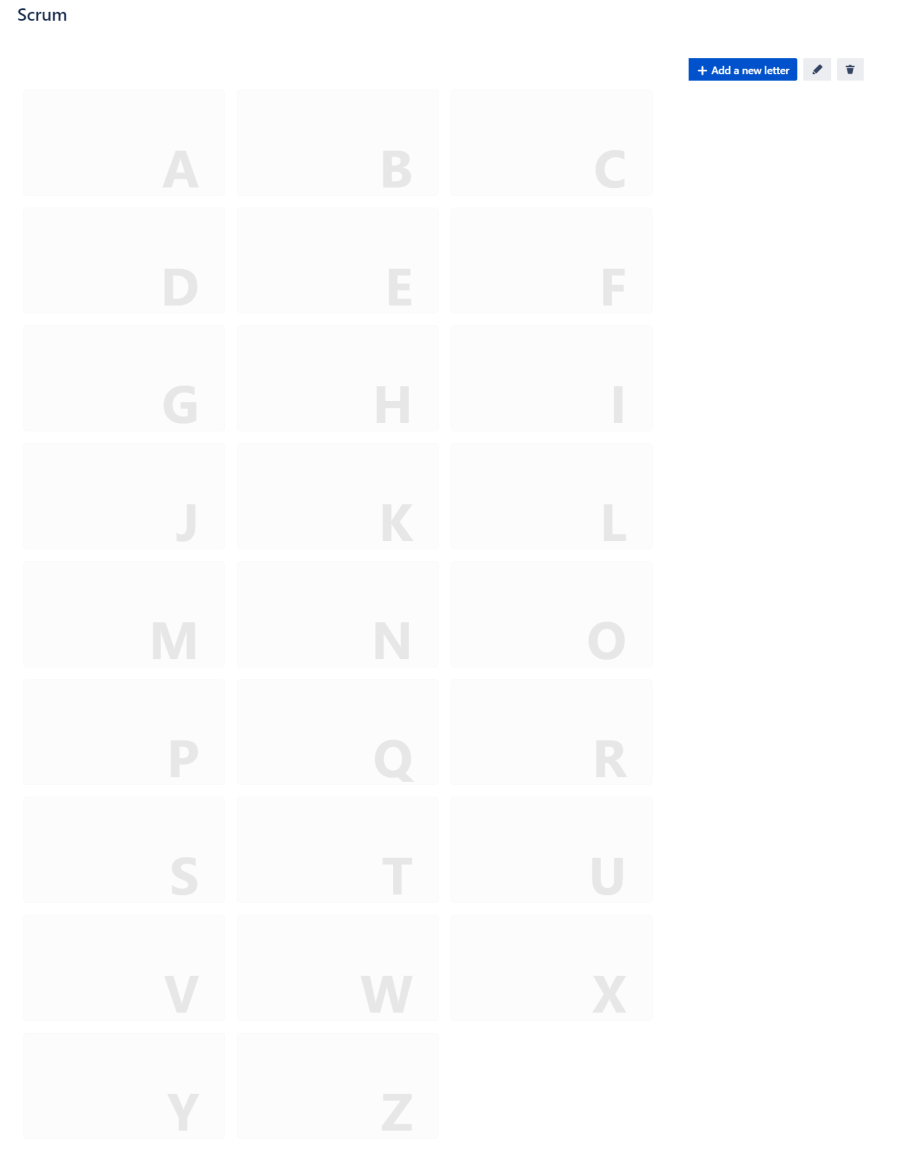
Glossary view is composed of letter links. By clicking on one of those boxes you will initialize the letter to terms to it.
If you don't find the corresponding letter or you wish to add a specific letter (starting by number or special character) you can add it from the Add a new letter button.
Glossary management and actions
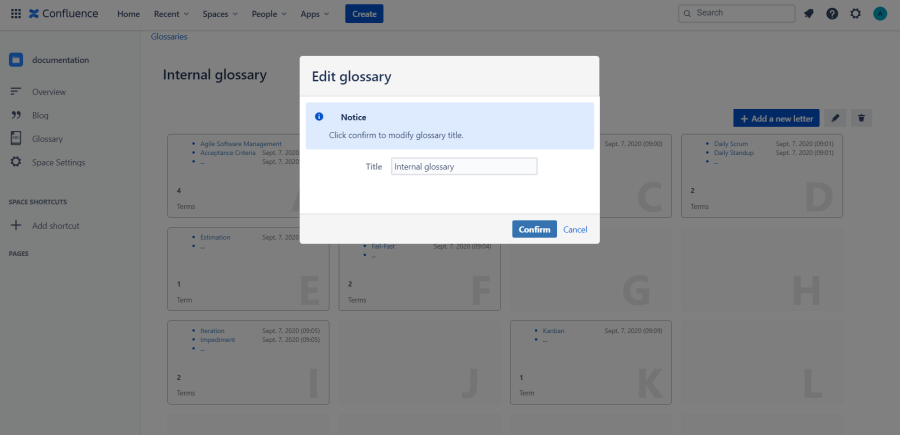
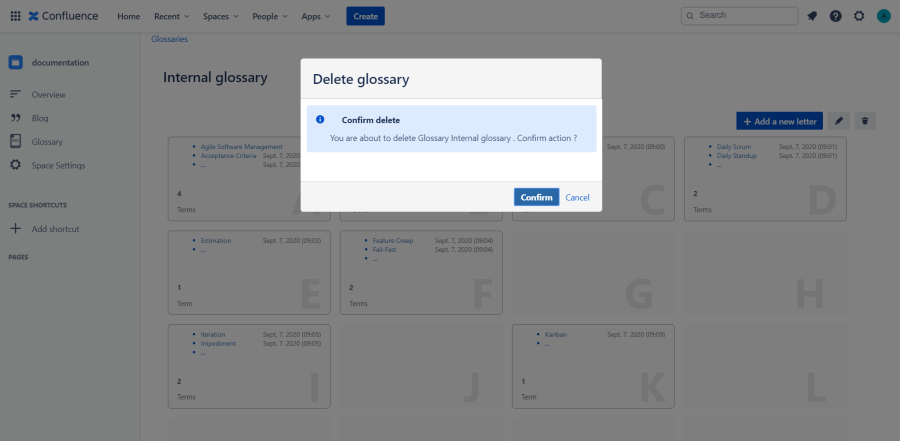
From the glossary index page, you can edit and delete the glossary by clicking on Edit button to change glossary title or the Trash button to delete the glossary.
Now after you created and located your glossary its time to start filling it with terms by clicking on the Add a new term button.
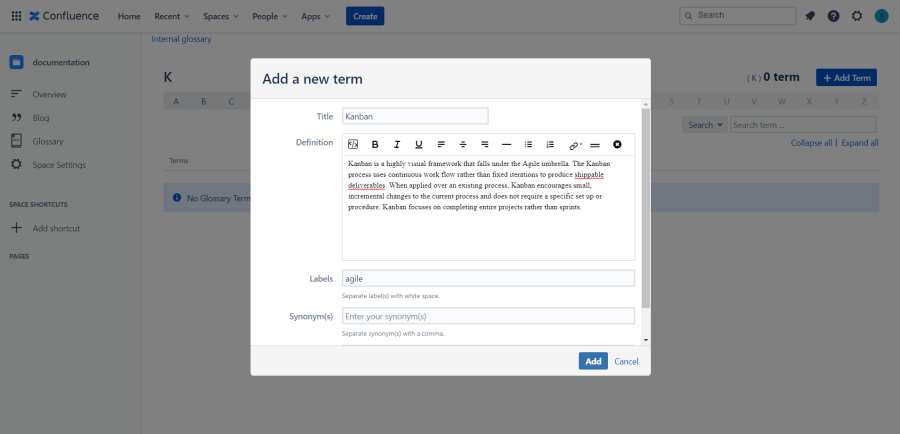
each term have :
- definition
- label (we are using existing labels already defined in your Confluence site)
- synonyms
- abbreviations
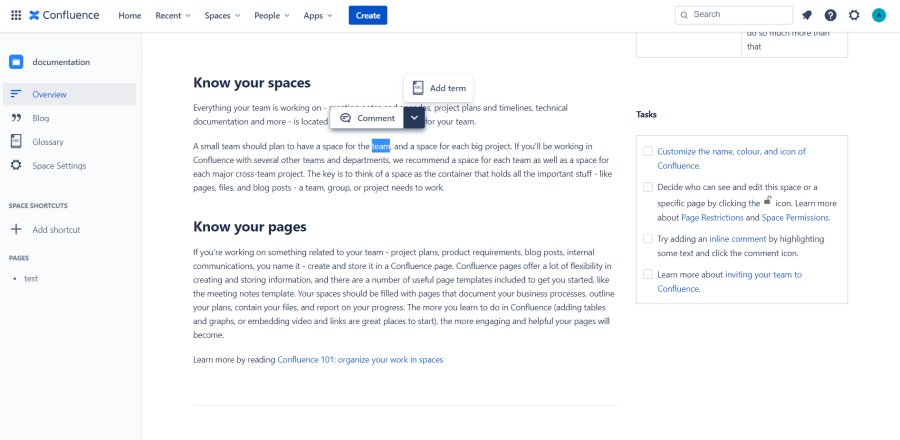
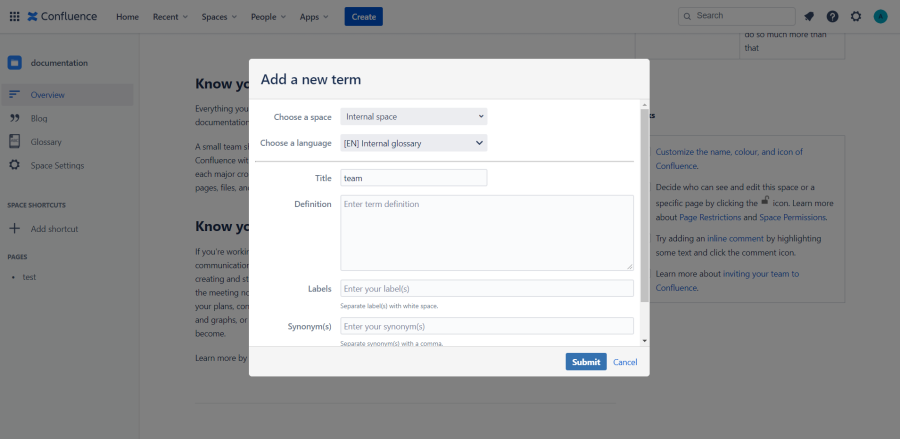
To encourage users to more participate in the creation of a knowledge base within your company, we made an option of adding new terms to your glossaries by just highlighting a text on any Confluence Cloud page and clicking the Add term button that appears then fill term fields.
This will open a new dialog to fill and edit your definition and metadata associated to your term to be added to Glossary.
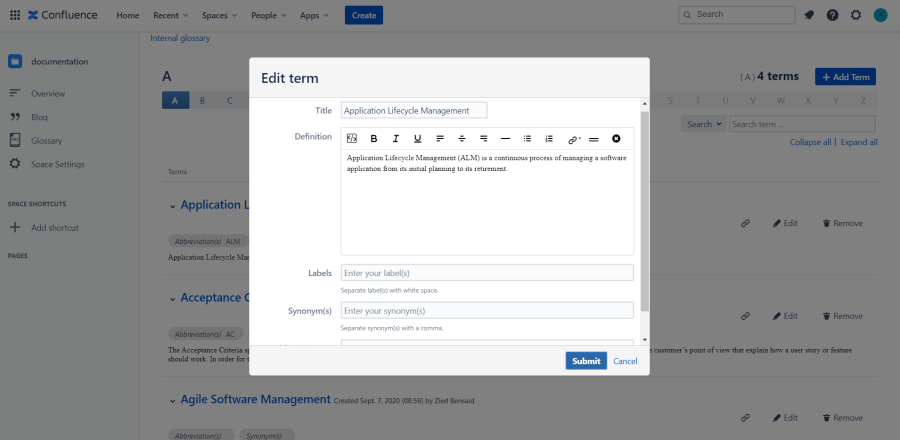
Actions on Glossary terms
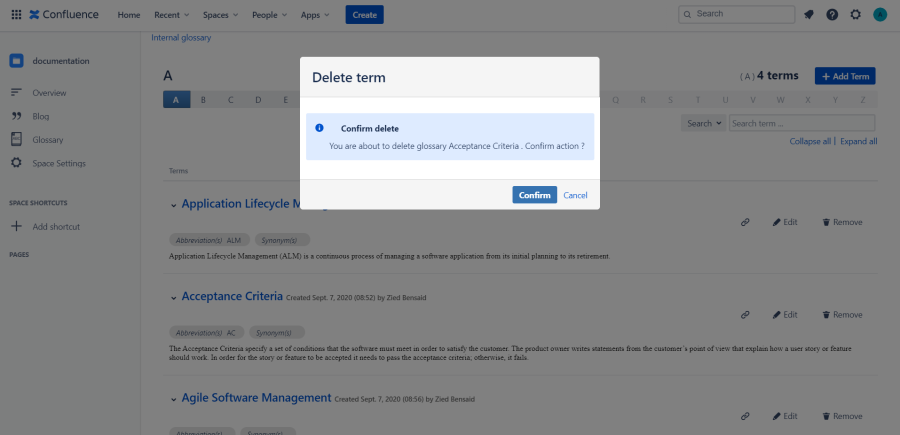
Each term created can be edited or deleted at any time using the Edit and Remove buttons.
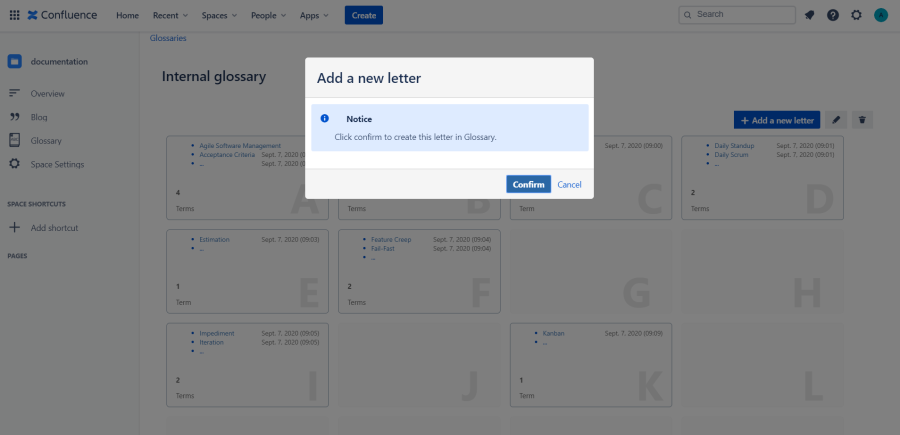
Each glossary created will contains all alphabets of the chosen language but it comes sometimes when we have terms that starts with a specific letter like É, À, Ù, etc that's why we created the feature of adding letters :
To add a new letter that does not exist in the dashboard.
- Click on the Add a new letter button at the bottom of the page,
- Type your letter in the dialog then click on Add,
- Initialize the new letter in your glossary by clicking on Confirm.

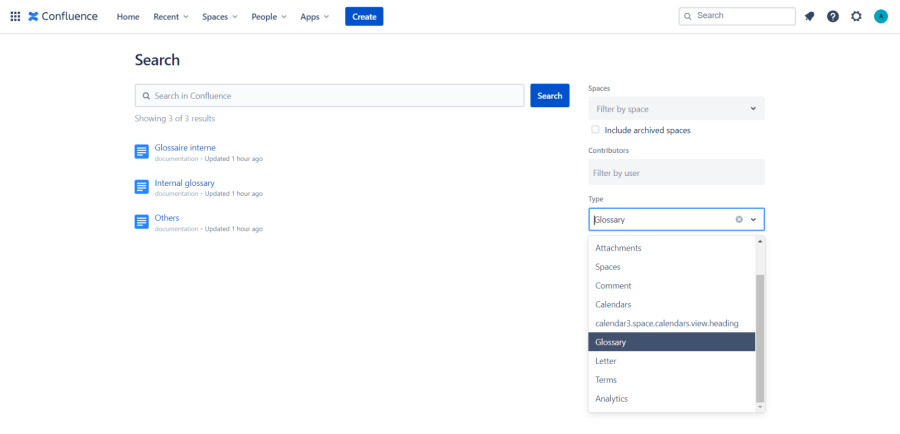
As your knowledge base grow by enlarging your glossaries, finding terms will be harder and harder, that's why we provided you with an advanced search tools to easily find all what you need. Searching for terms can be done either from the letter page using the search box and filtering by Term title, Definition, Abbreviation, Synonym or Label or from the native Confluence Search bar and confluence advanced search you can search for glossary , letter and terms.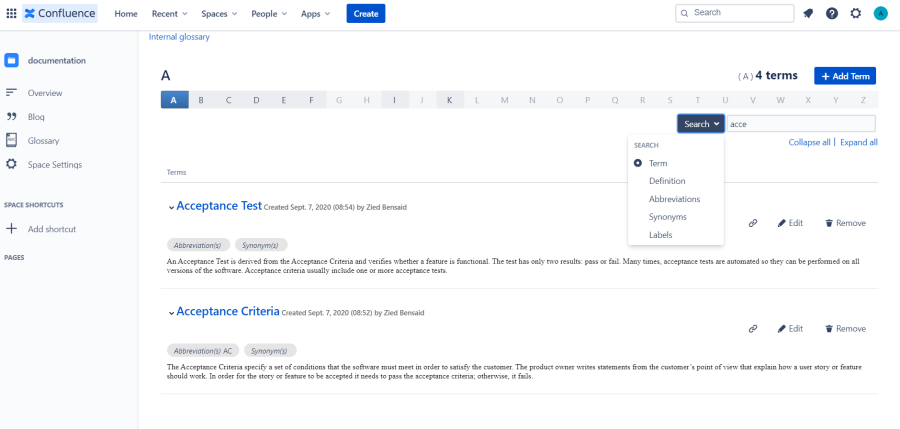
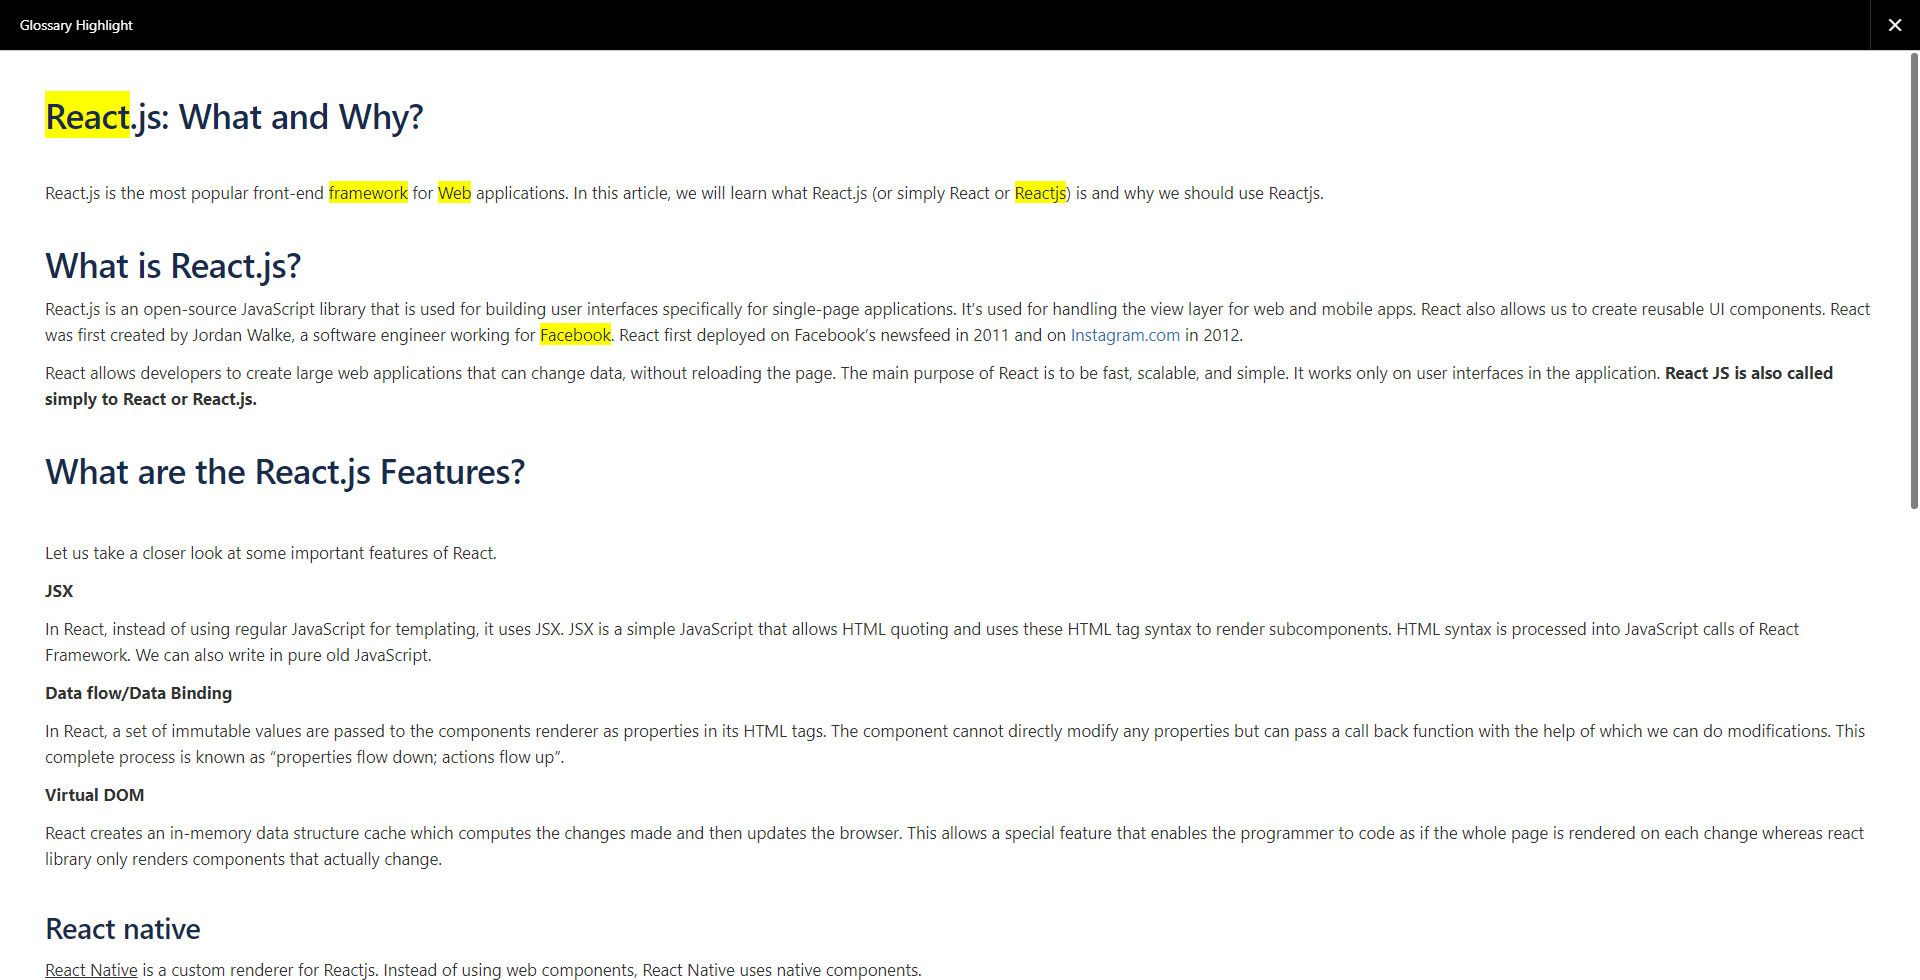
Glossary highlight terms NEW VERSION 1.0.6
1-Configuration
Due to the access rights possible restrictions for some user, talking about the user that may have no right to access to the global configuration, we previewed two configurations: a global one: which is the active one by default for the entire users, and another one in the space configuration which could activated to override the default global configuration.
We explore next bot of it.
1.1-Global config
-The actual configuration is a global one; means what you set there will be relevant to all your instance spaces and users.
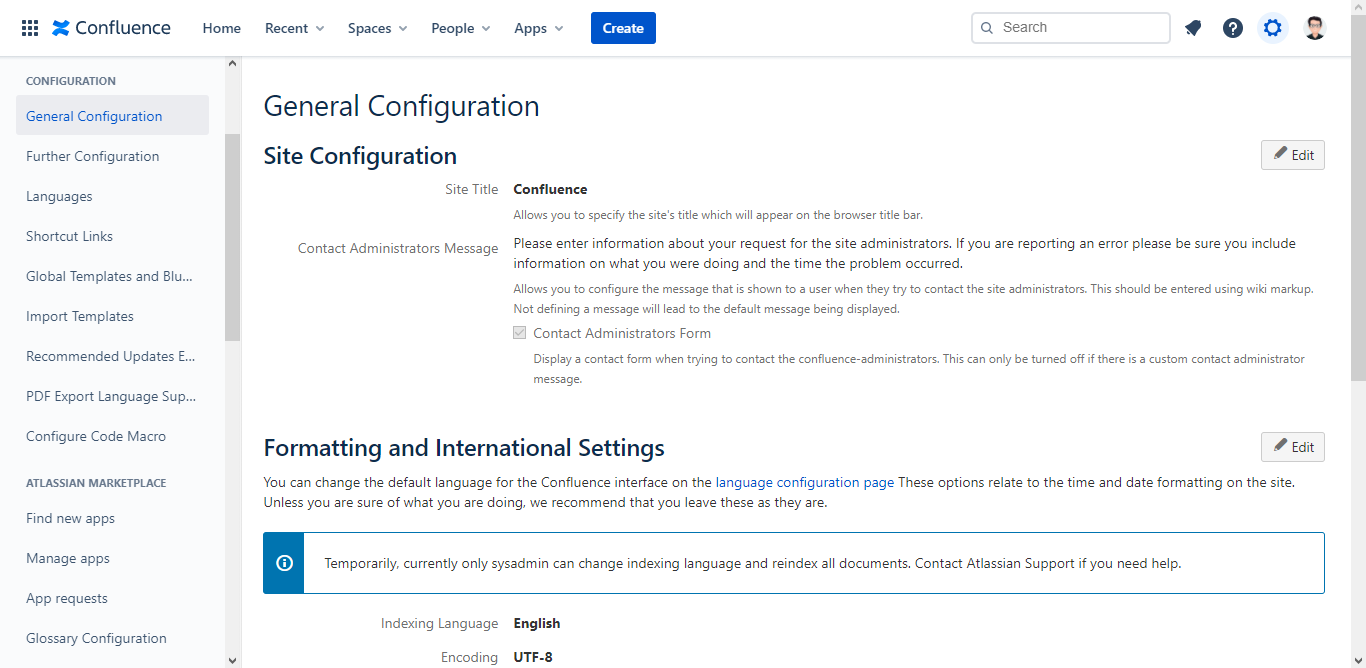
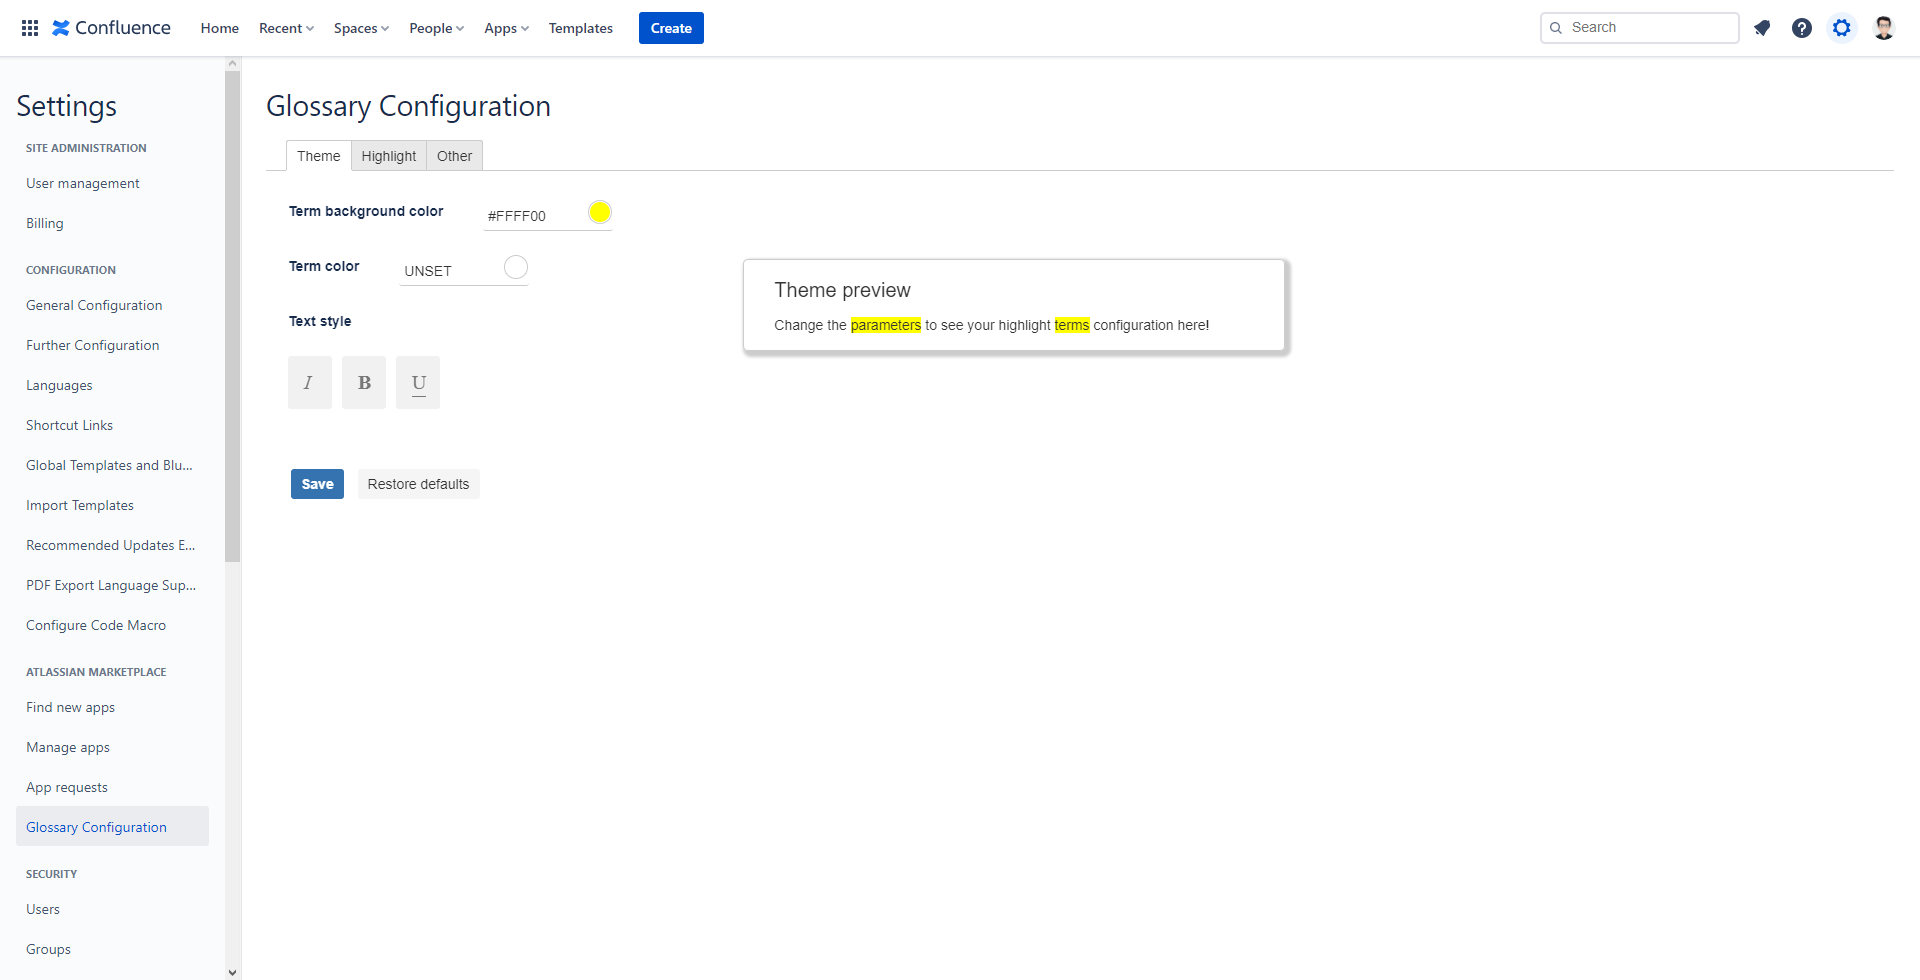
-You access the global configuration from the app global Settings. What you are looking for is named “Glossary Configuration”
1.1.1-Theme tab
- Term background color: choose there the wished background for the highlighted terms. You can change the color either by using the color picker, or by writing a correct hex format color (the color circle will change to the entered color if your entered code is correct).
- Term color: choose, by the same way as before, the highlighted term text color
- Text style: choose or combine text styling. Possible options are italic, underlined and bold text
- a real time preview for your settings is available in the view right side
1.1.2-Highlight tab
- Terms space(s) source(s): choose the space source for the terms that you which to highlight. Possible options: current: highlight only the terms that are saved in the current space glossaries, all: highlight the terms that are saved in all the spaces glossaries and custom: select the spaces source from the available spaces in your instance, a multi select is possible also.
- Highlight options: choose if you want to highlight terms abbreviations and/or synonyms: the selected option will cause that even the term abbreviations and/or synonyms will be highlighted as the term itself.
- Accuracy: Either one of the following string values:
- "partially": or in other words highlight sub term. example when searching for "lor" only "lor" inside "lorem" will be marked.
- "exactly": only the exact terms will be highlighted
- - Occurrence: set limit of each term number to be highlighted. it is sited to one by default.

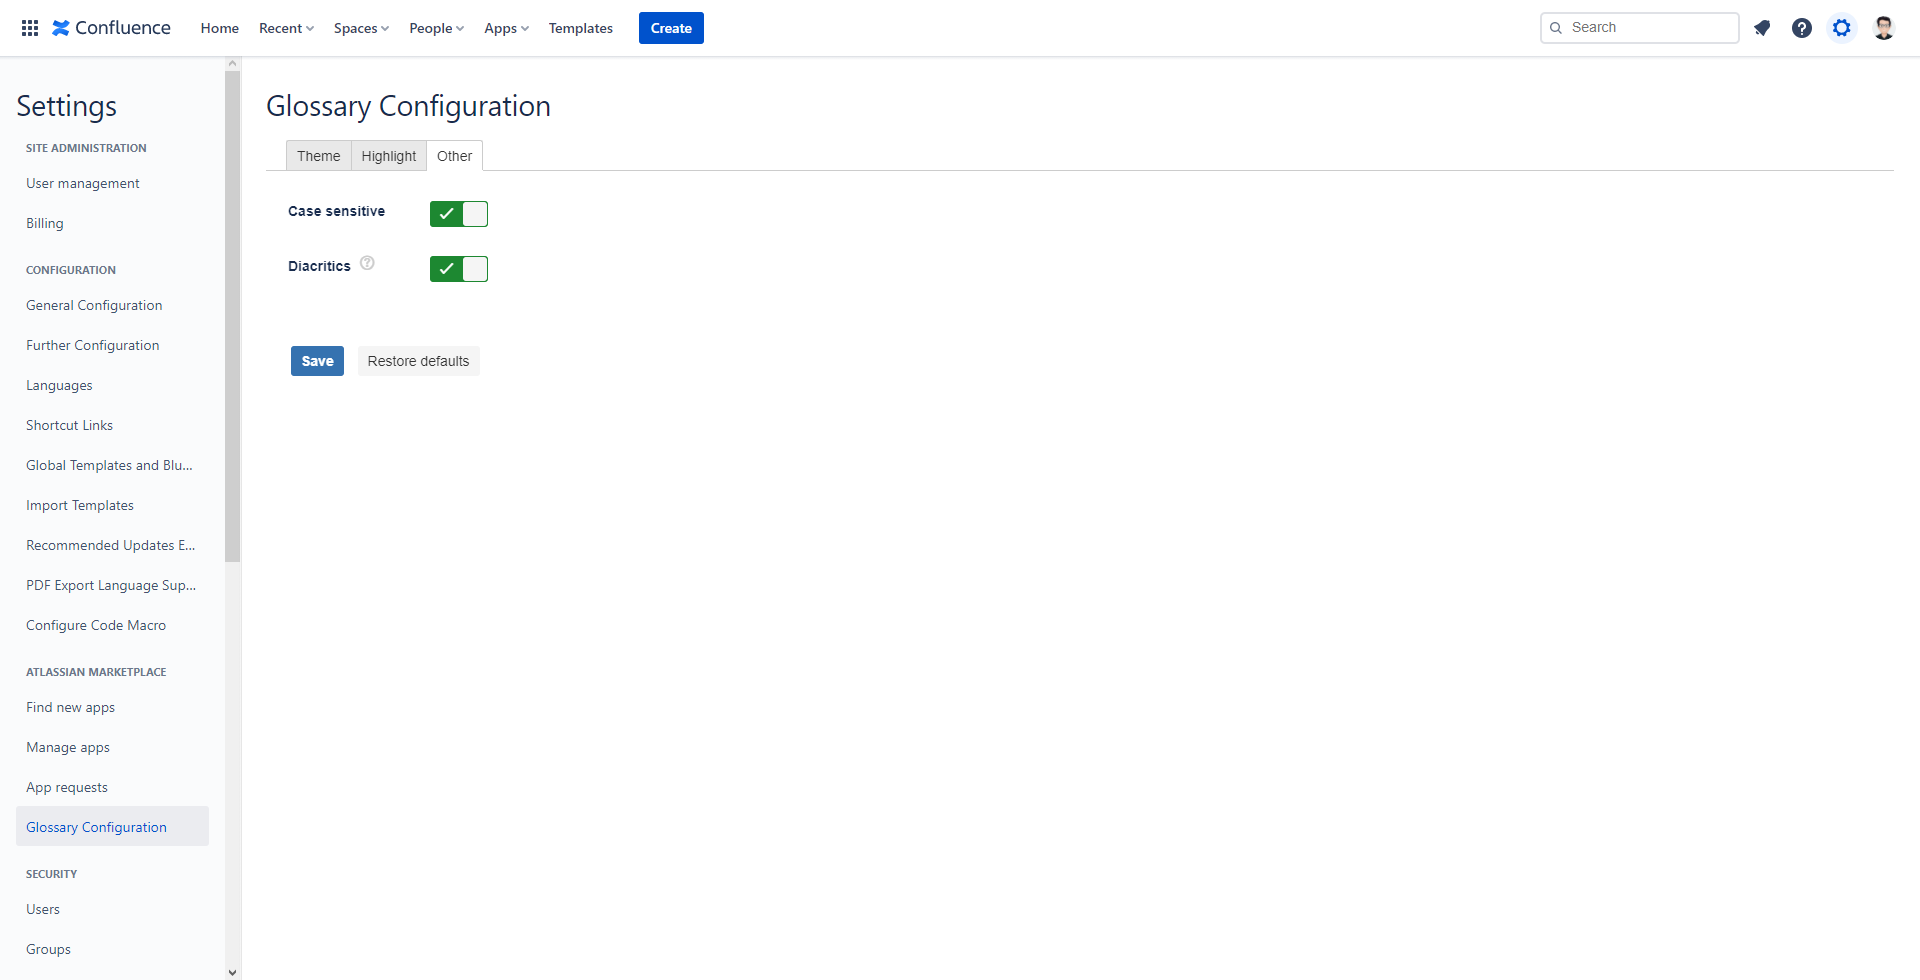
1.1.3-other tab
- - Case sensitive: Whether to search case sensitive
- - Diacritics: If diacritic characters should be matched. For example "piękny" would also match "piekny" and "doner" would also match "döner". It is helpful for language as French and german languages as example.
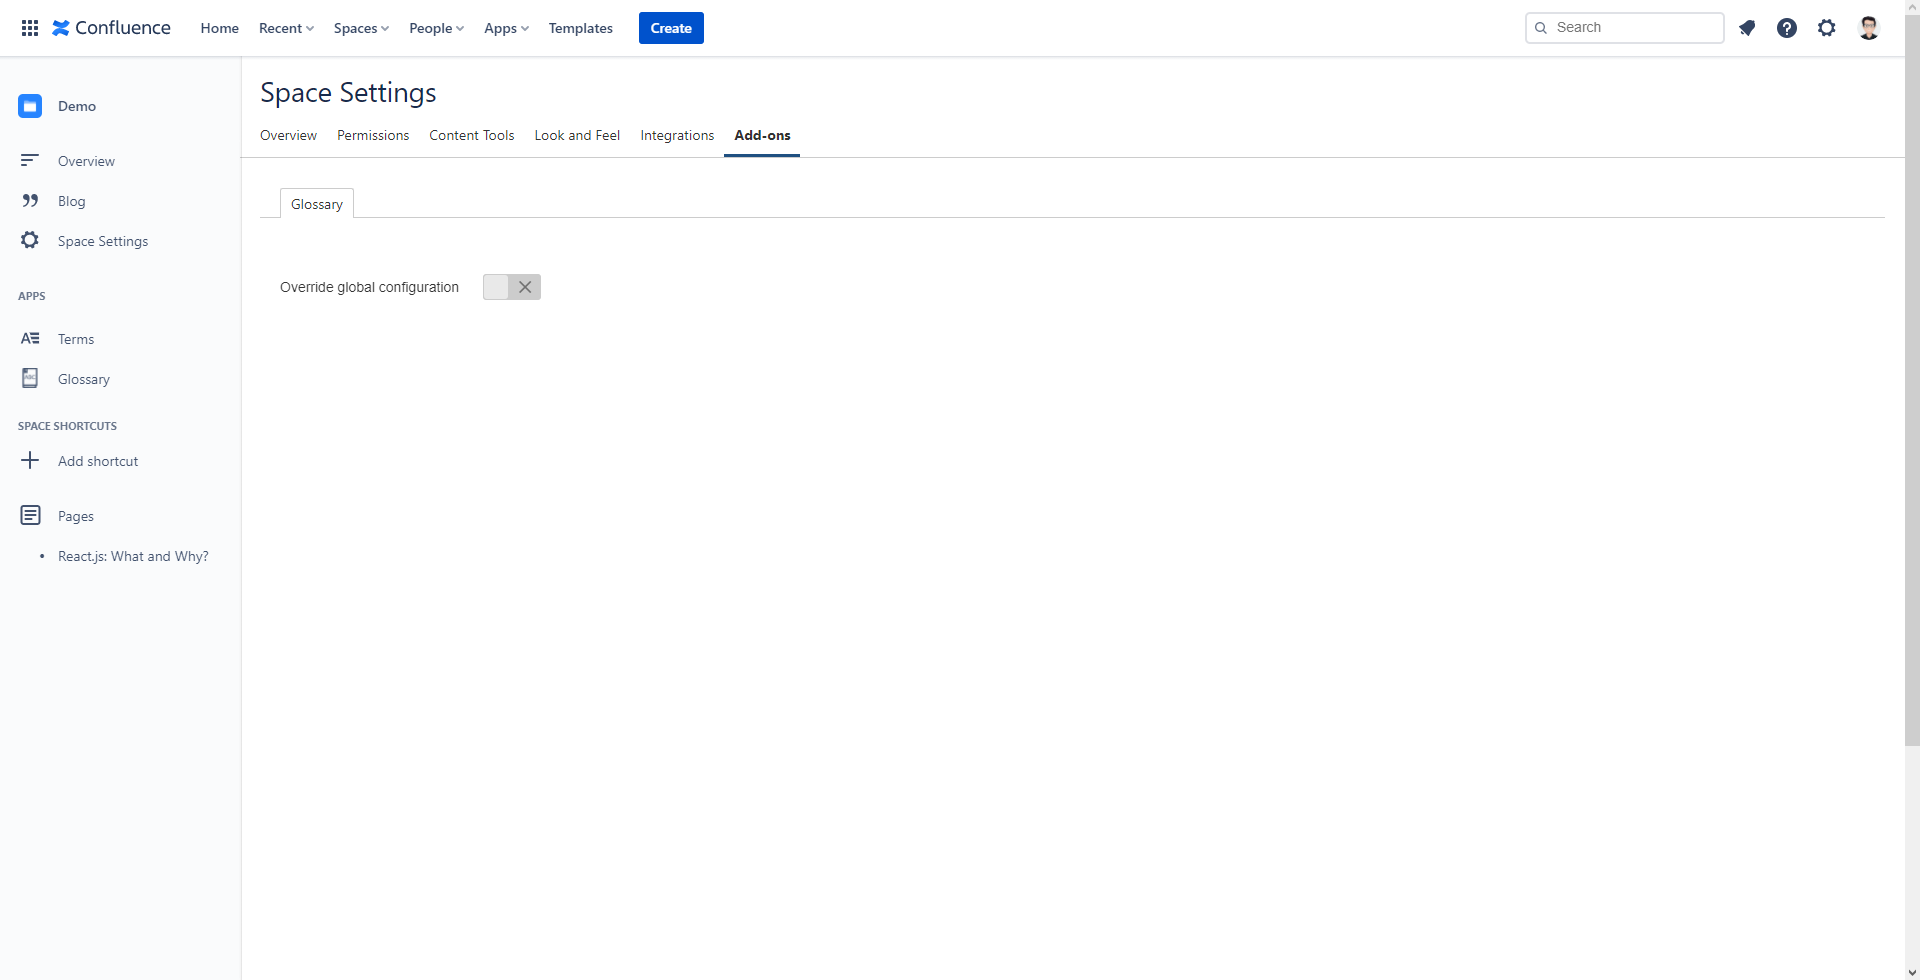
1.2- Space settings configuration: local configuration
Under the Add-ons tab, you can access glossary local configuration which if activated would override the default global one. To do that you just need to toggle the override button, a successful flag appears telling that the global configuration has been overridden.
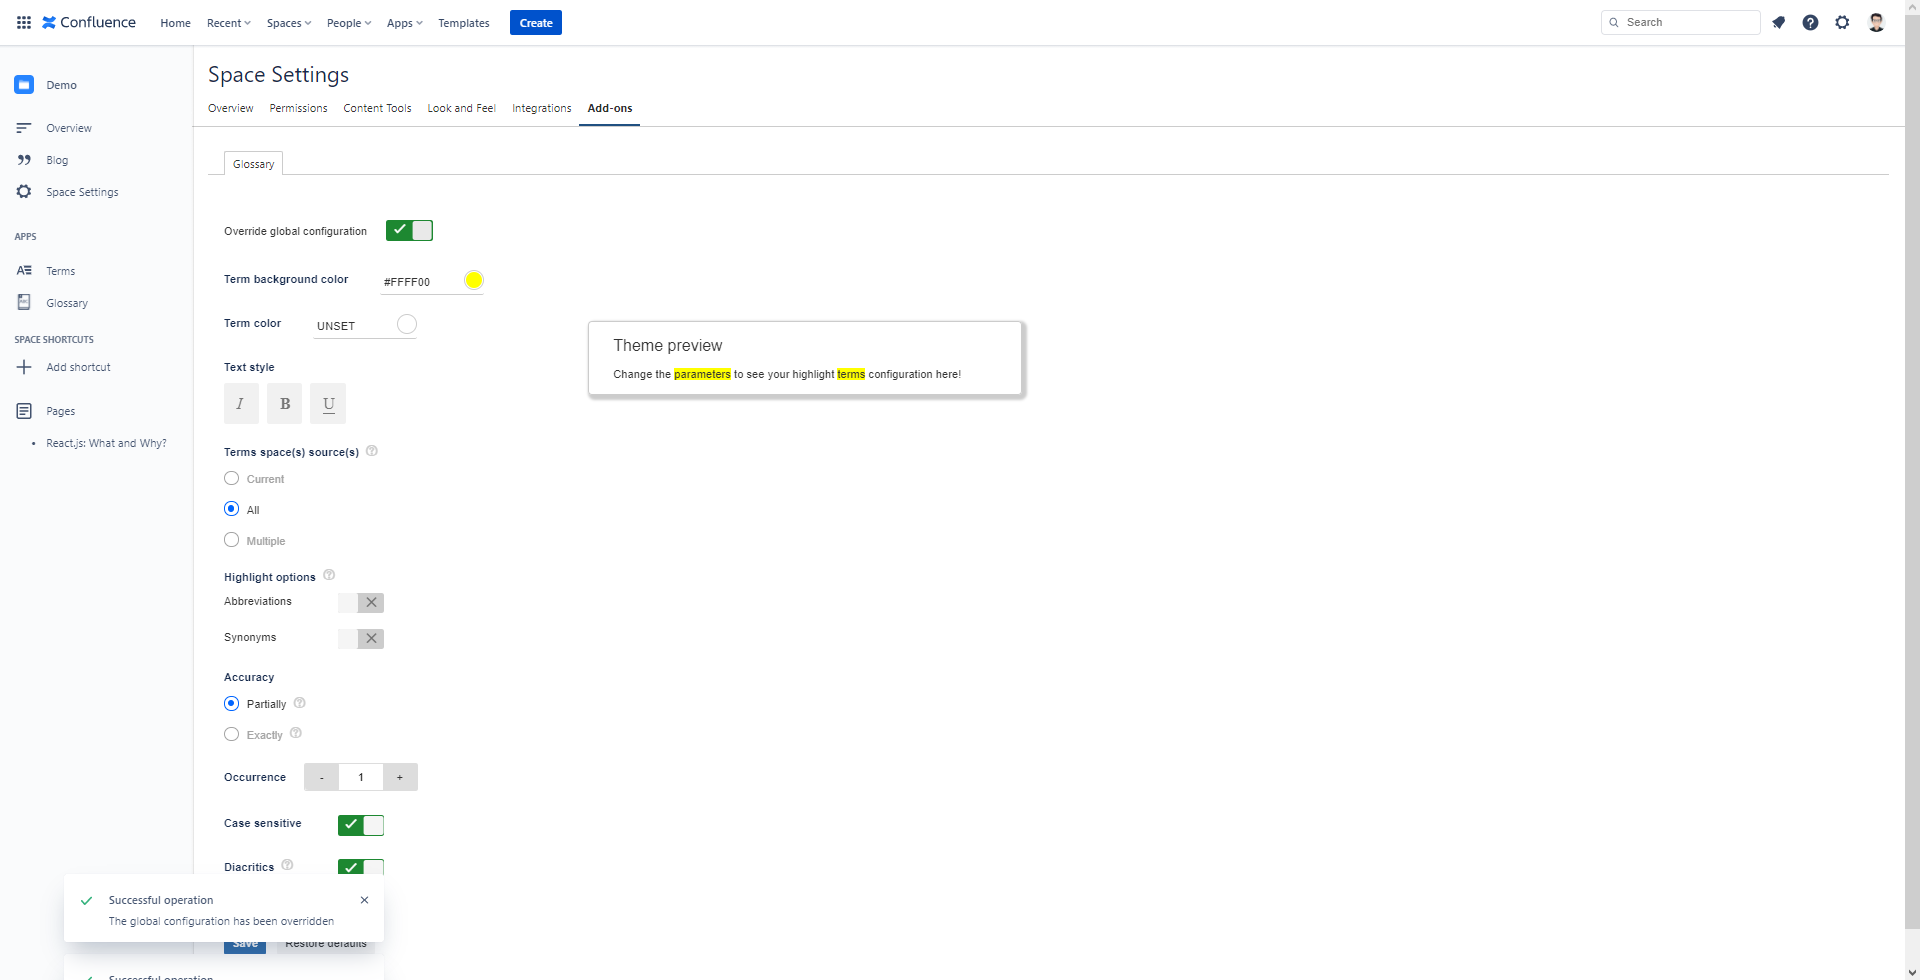
There you can find all previous settings already explained for the global config, you just find all of them in one tab this time
2-Dialog
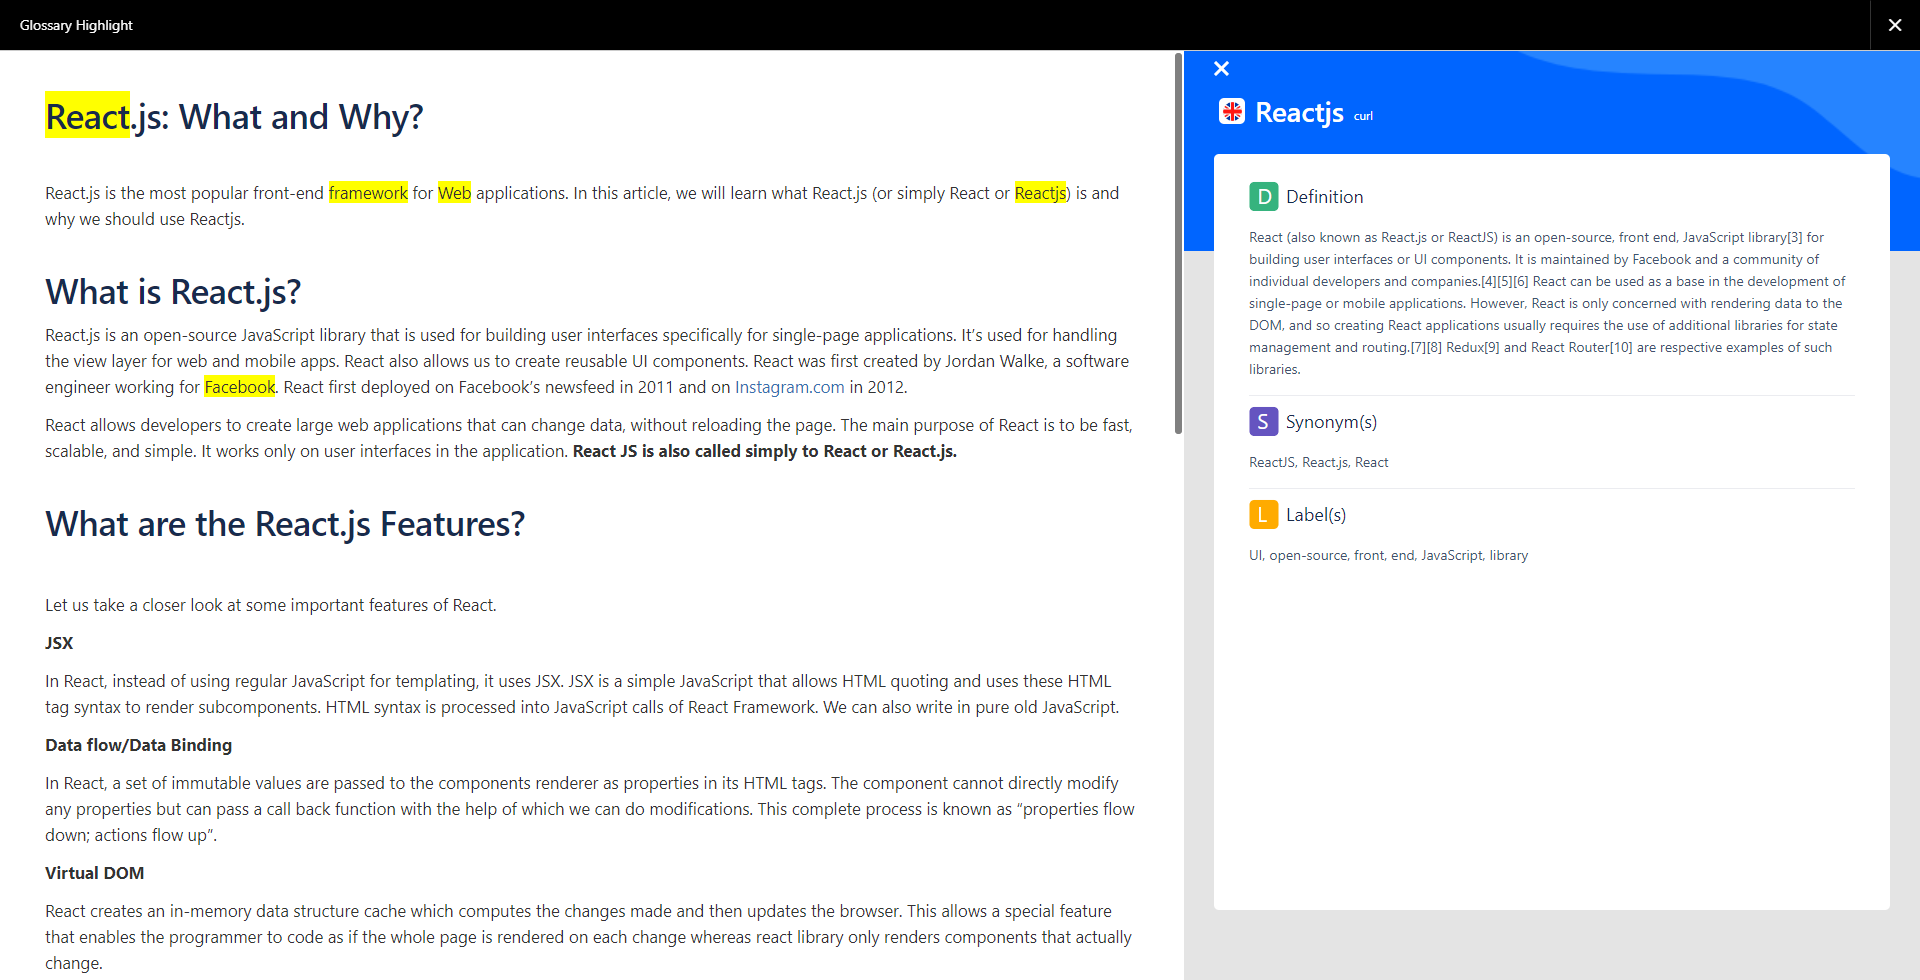
Accessing your confluence cloud page, you can open the glossary highlight terms dialog by clicking on the glossary icon in the top right side of the page. That’s will open a full screen dialog where you get the highlighted terms by default.
To get a term data (definition, synonyms, space…) just click on the term, a resizable right side panel will be open containing all the available saved data about that term. You can access the term page in its glossary by clicking on the term title (in side panel sure), however you can access to its space by clicking on the space name. If the name is available in multiple spaces sources you can navigate via the top right navigation arrows through terms data in each space.
To close the side panel click on the cross located in the top left side of the panel.